Prerequisite: Complete Mac App Setup first. You’ll need a USB cable to connect your iPhone to your Mac.
Step 1: Plug in your iPhone
Connect your iPhone to your Mac via USB. The Mac app detects the phone automatically.Step 2: Trust and authorize
You may see one or both of these prompts:- On iPhone: “Trust This Computer?” — tap Trust and enter your passcode
- On Mac: “Allow this phone to connect?” — click Allow
These prompts don’t always appear (especially if you’ve connected before). If the Mac app doesn’t recognize your phone after approving, unplug and replug the USB cable.
Step 3: Headphone popup
A popup appears on your iPhone asking if the connected device is headphones or another device. Tap Other Device.Step 4: Install the setup shortcut
The Mac app shows a QR code on screen. Scan it with your iPhone camera. This will open the TapKit Phone Setup shortcut. Tap Add Shortcut to install it.See screenshot
See screenshot

Step 5: Run the TapKit Phone Setup shortcut
After installing, the shortcut should appear automatically. If it doesn’t, open the Shortcuts app and check the first tab (called Library or Shortcuts depending on your iOS version). Tap TapKit Phone Setup to run it. This is a guided setup experience built with Apple Shortcuts. It takes about five minutes — just read the instructions on screen and follow along. After the setup shortcut is completed, return back to the Mac app.Step 6: Install the Use TapKit shortcut
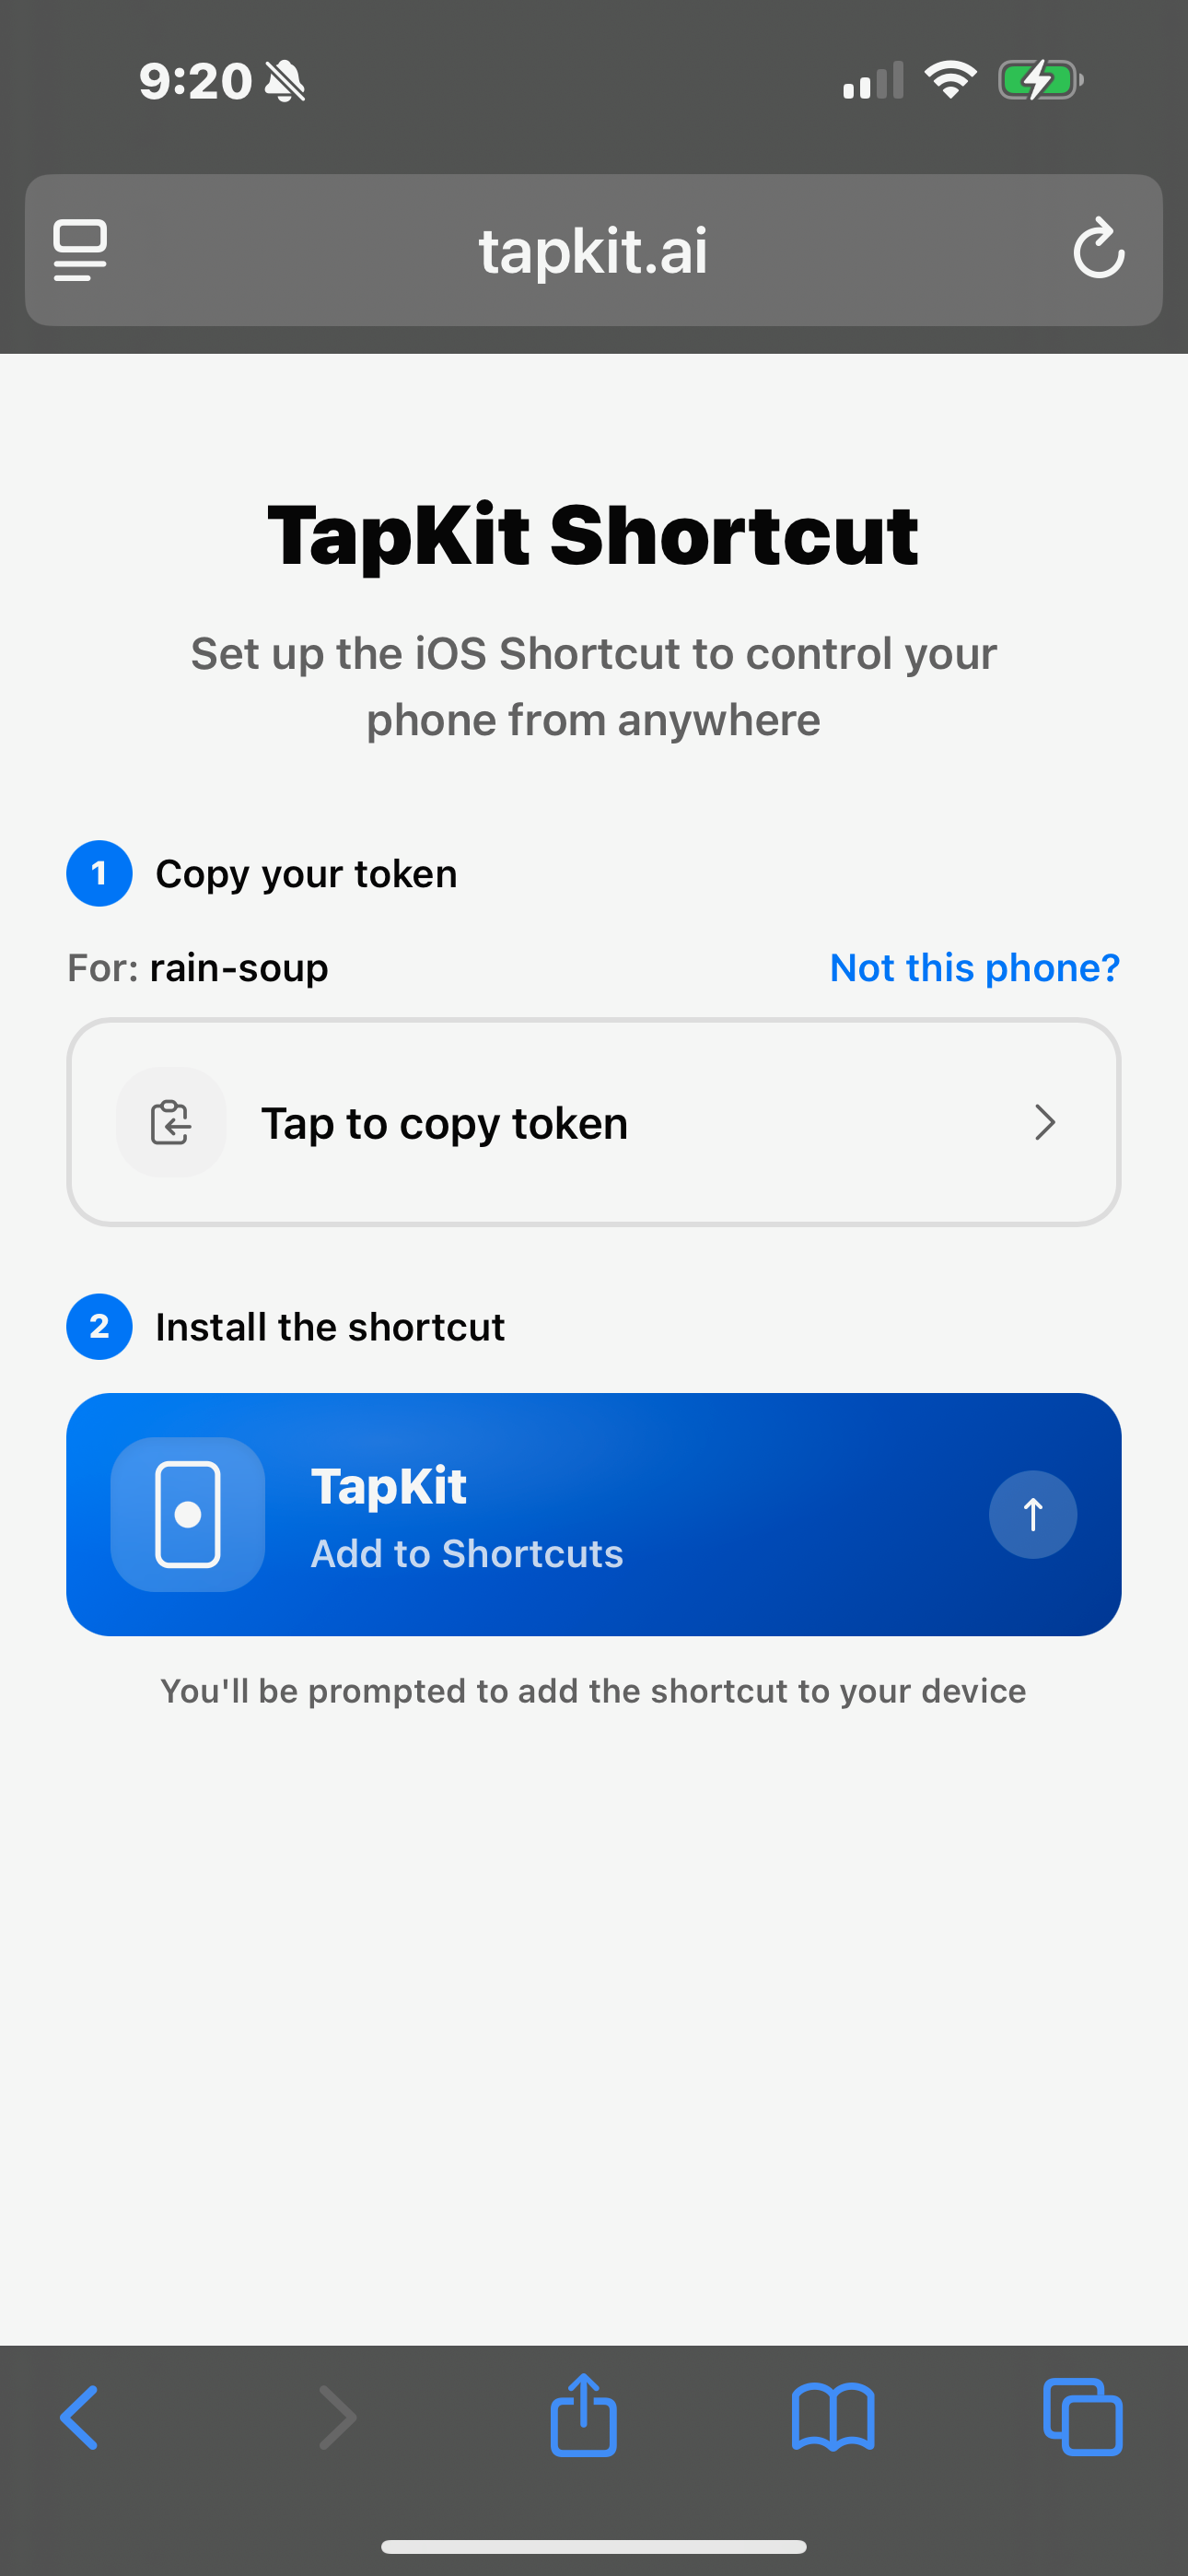
Scan the second QR code shown in the Mac app. This opens the TapKit website in a logged-in state.- Tap the Tap to copy token button to copy your token.
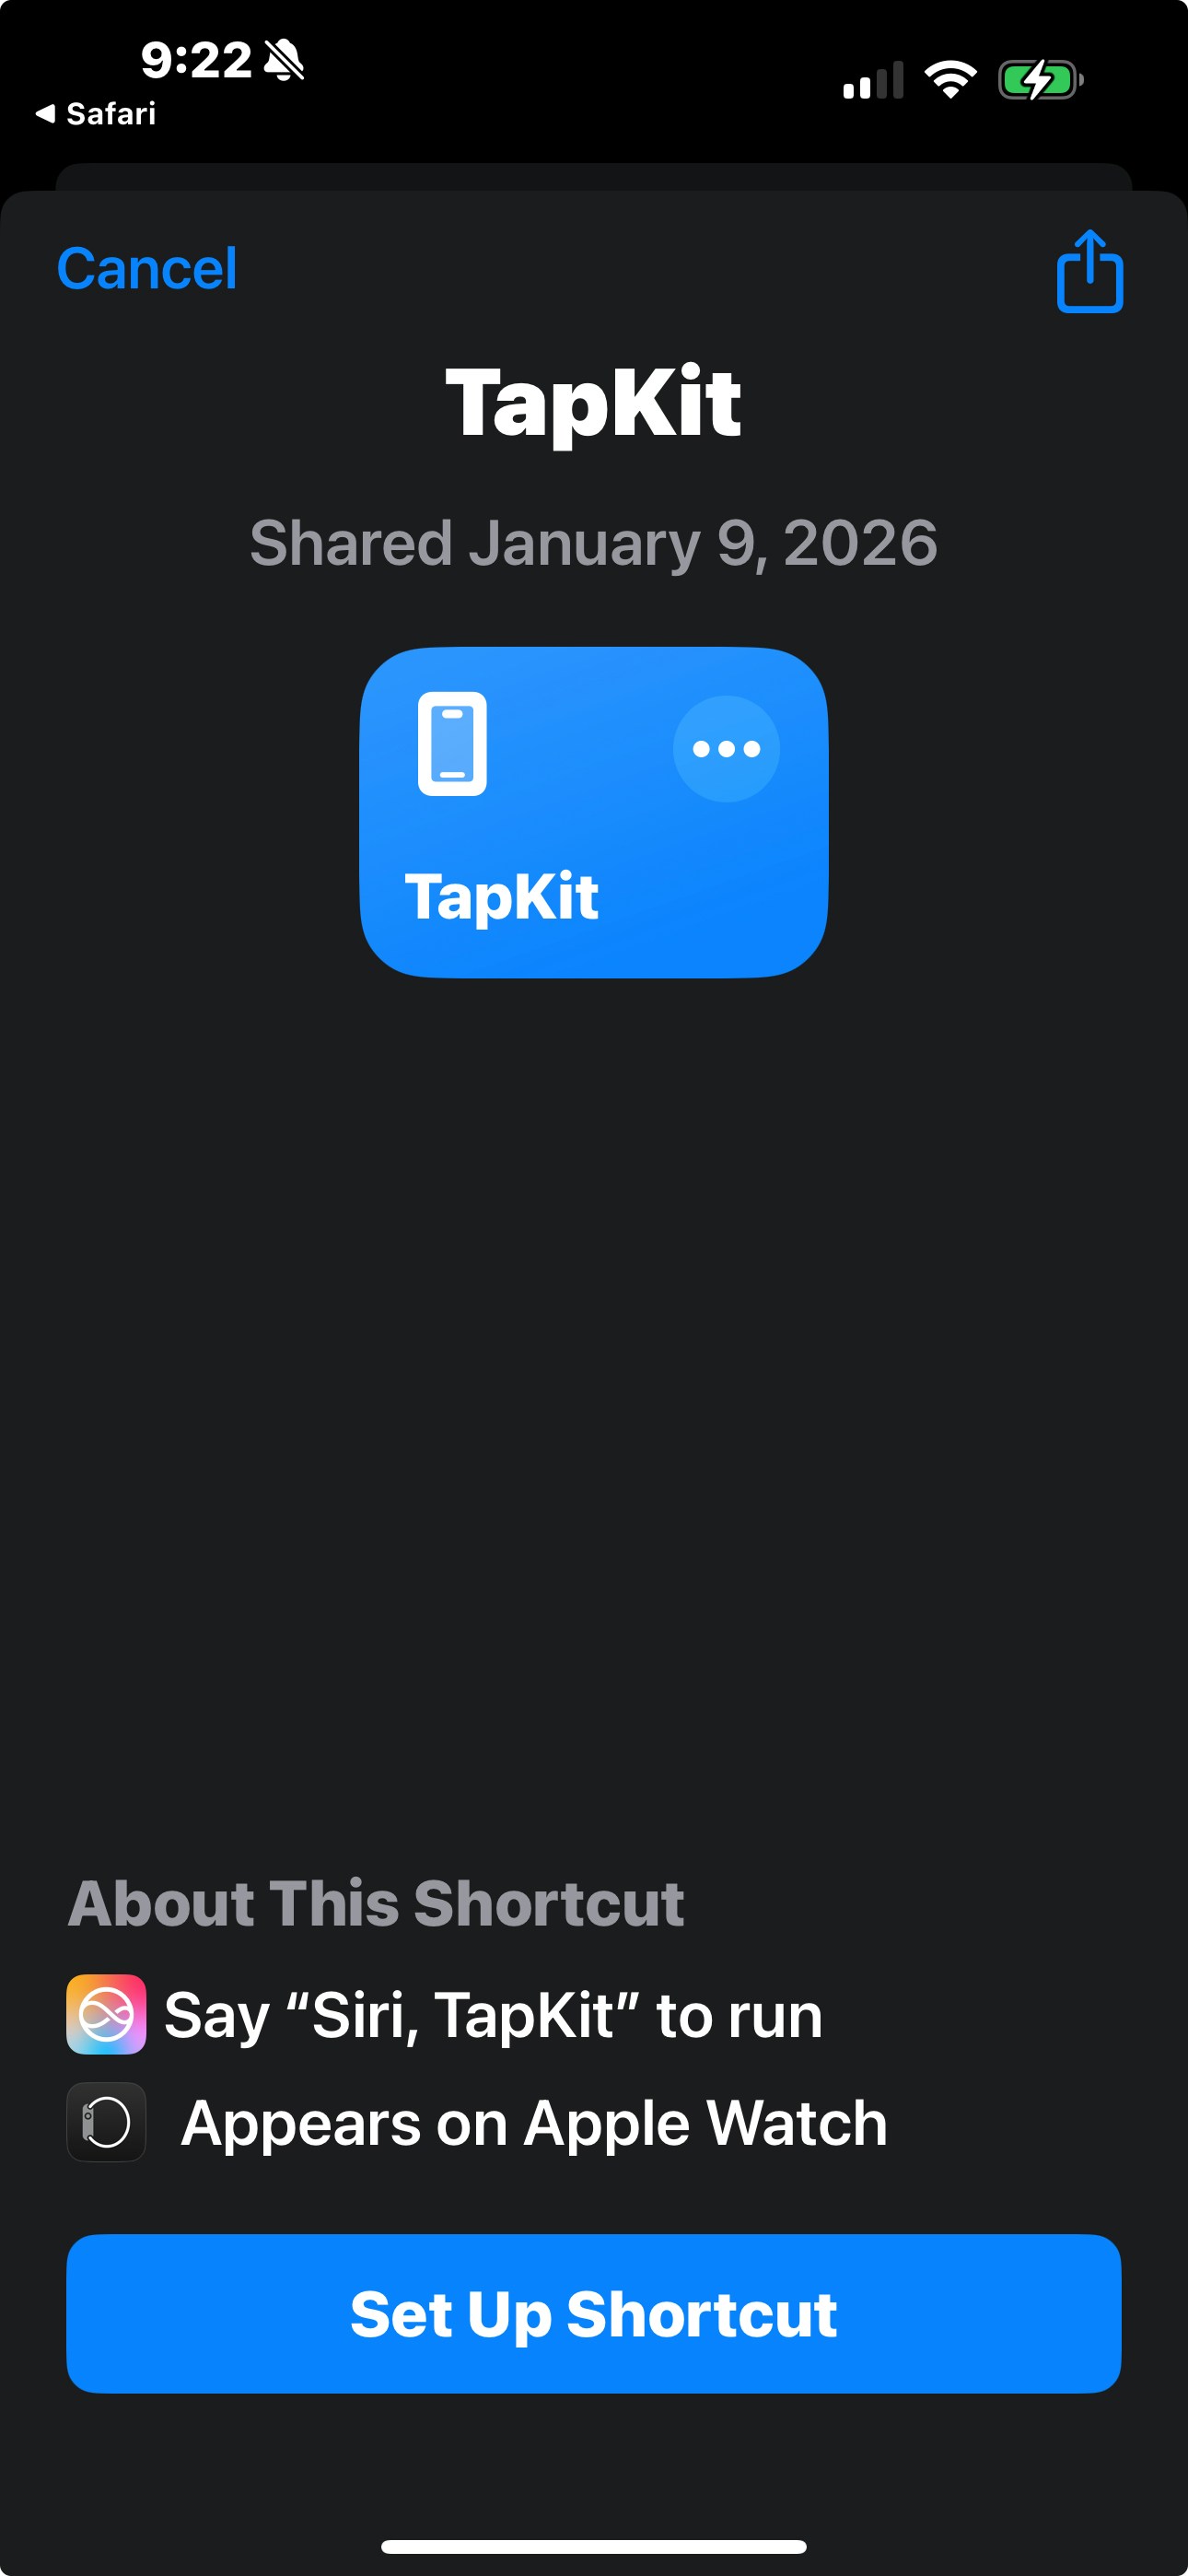
- Tap the Use TapKit shortcut to open the install prompt.
- Tap Set Up Shortcut.
- Paste the token into the API key field.
- Tap Add Shortcut.
See screenshots
See screenshots

Step 7: Run the Use TapKit shortcut
- Navigate back to the first tab of the Shortcuts app (called Library or Shortcuts depending on your iOS version).
- Tap the Use TapKit shortcut to run it.
- Approve any permission popups that appear.
Done
Your phone is set up. The Mac app should show your phone as connected and ready.Run your first task
Go back to the Quickstart and try your first command.
Integrations
Connect TapKit to Claude, Codex, or other AI tools.
Troubleshooting
Phone not detected after plugging in
Phone not detected after plugging in
Unplug the USB cable, wait a few seconds, and plug it back in. Make sure to approve any “Trust This Computer?” or “Allow” prompts that appear on either device.
Phone not on Wi-Fi
Phone not on Wi-Fi
Your phone can look like it’s on Wi-Fi but not actually be connected. Go to Settings > Wi-Fi on your iPhone and explicitly tap your network to reconnect. This is the most common troubleshooting issue.
QR code won't scan
QR code won't scan
Make sure your iPhone camera is in photo mode (not video or portrait). Hold the phone steady about 6-8 inches from the screen. If the QR code still won’t scan, try increasing your Mac’s screen brightness.
Setup Shortcut fails midway
Setup Shortcut fails midway
Run the Shortcut again — it’s safe to re-run. If it continues to fail, make sure you’re running iOS 16 or later and that you have the Shortcuts app installed.
Can't add untrusted Shortcuts
Can't add untrusted Shortcuts
Go to Settings > Shortcuts on your iPhone and enable Allow Running Scripts and Private Sharing. This allows installing Shortcuts from sources other than the Shortcuts Gallery.
Headphone popup keeps reappearing
Headphone popup keeps reappearing
This can happen if the screencast connection drops and reconnects. Tap Other Device each time. If it happens frequently, make sure your USB cable is securely connected.