Step 1: Download and install
- Download the TapKit Mac app. If you don’t have it, you can download it here.
- Open TapKit.dmg from your Downloads folder.
- Drag TapKit into your Applications folder.
- Launch TapKit from Applications.
Step 2: Sign in
When you first launch TapKit, it’ll open a sign-in page in your browser. Don’t worry if you don’t have an account — this will create one for you. After signing in, you’ll be redirected back to the app.Step 3: Grant permissions
The Mac app needs three macOS permissions to work. You’ll be prompted for each one. For a deeper explanation of why each permission is needed (and what it’s not used for), see Security & Privacy.Automation
Allows TapKit to run macOS Shortcuts for phone communication. Click OK when prompted.See screenshot
See screenshot
Screenshot coming soon
Camera
Allows TapKit to capture the phone’s screen via the screencast stream. Click OK when prompted.See screenshot
See screenshot
Screenshot coming soon
Accessibility
Allows TapKit to control Switch Control and send commands to the phone. When the system dialog appears, click Open System Settings and enable TapKit.See screenshot
See screenshot

Step 4: Switch Control configuration
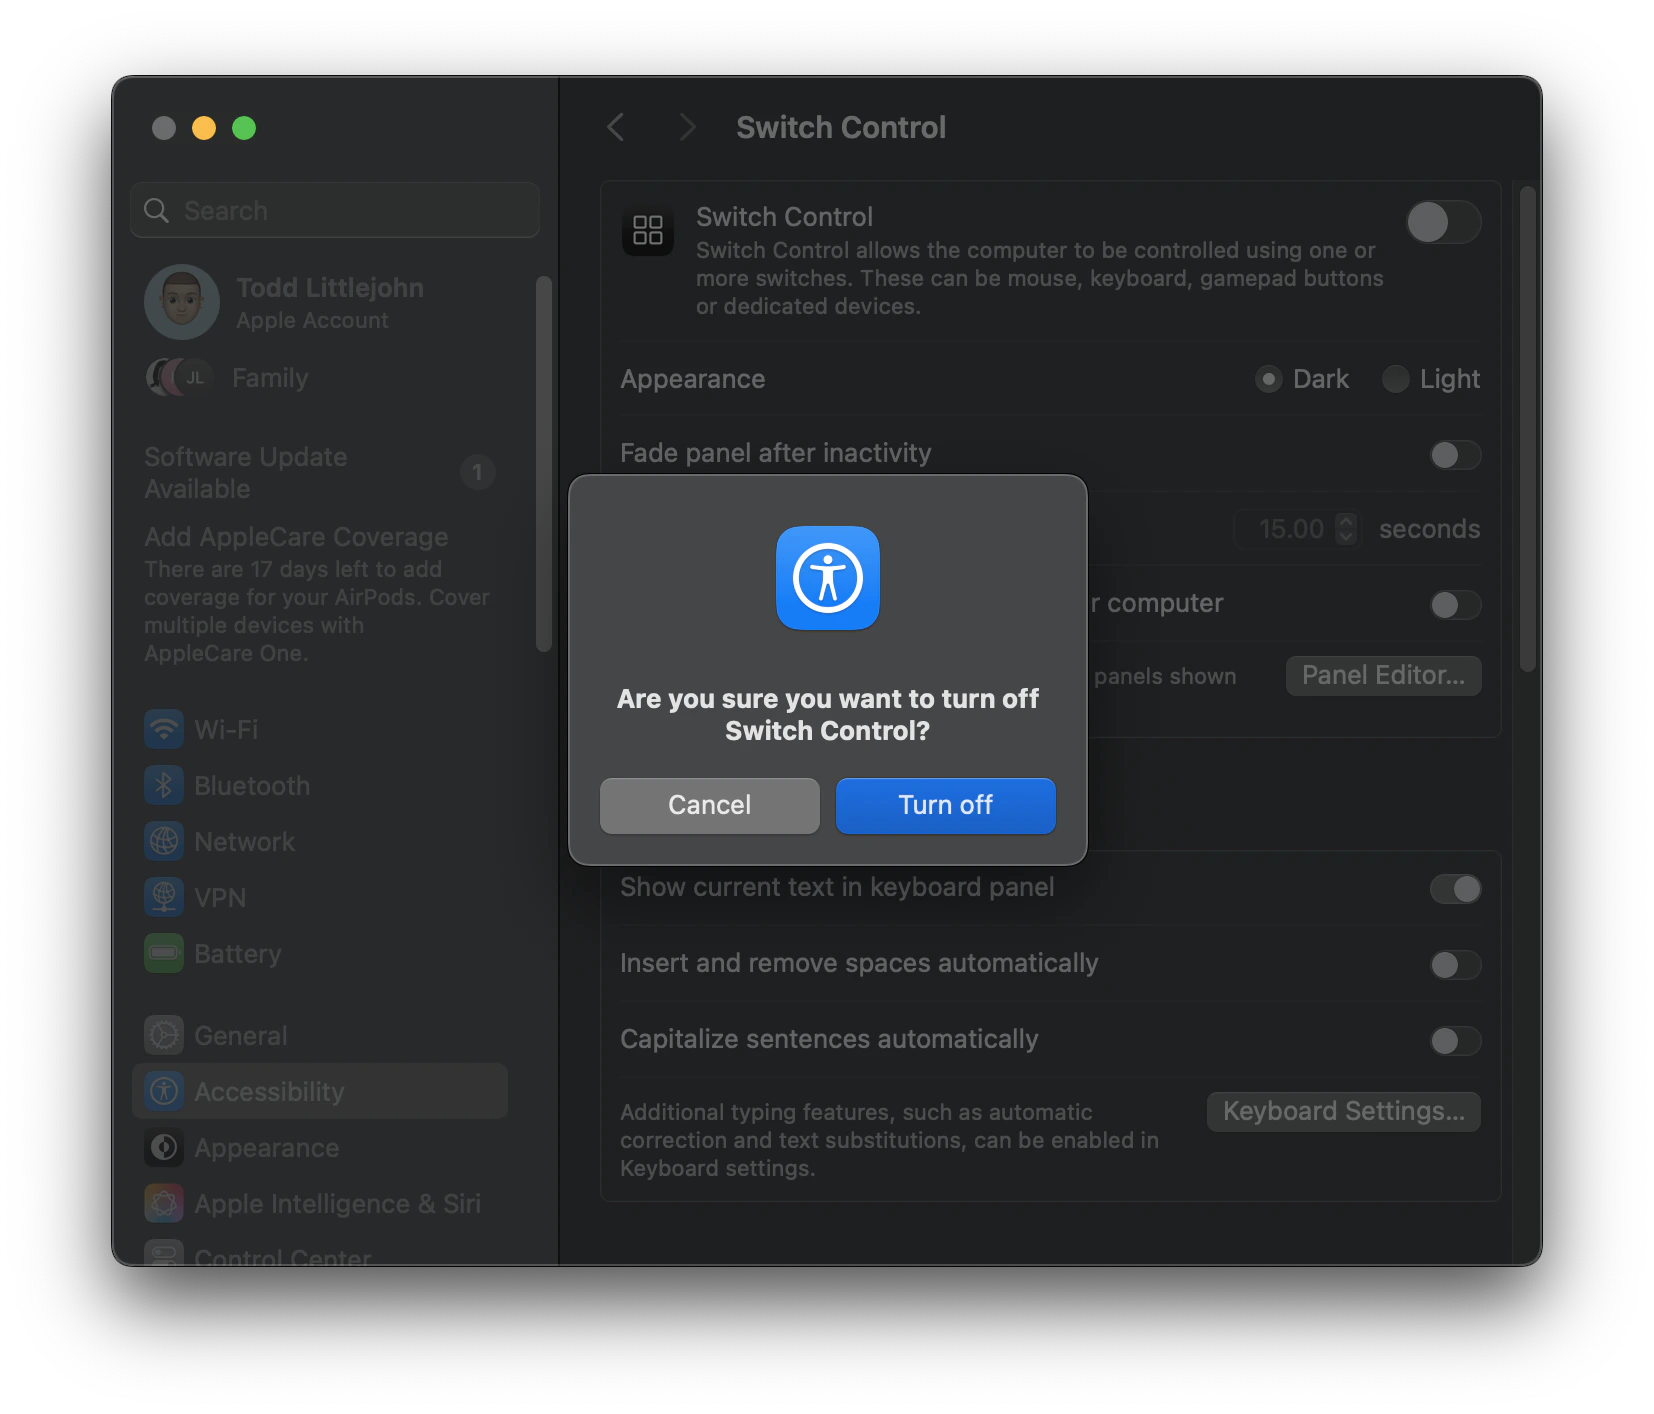
Enable Switch Control
The app will automatically open System Settings and toggle on Switch Control for you. It’ll prompt you for your Mac password — enter it to authorize the change. Once done, it’ll automatically close System Settings. You’ll see a dialog asking about Switch Control — just hit Turn Off.See screenshot
See screenshot
Configure Switch Control
TapKit then runs an automatic configuration flow that sets up Switch Control profiles and settings. This happens in the background — you’ll see a brief progress indicator.View what it looks like
View what it looks like
GIF coming soon
Step 5: Install macOS Shortcut
The app prompts you to install a macOS Shortcut that enables communication between the Mac app and your phone. Click Add Shortcut when prompted.See screenshot
See screenshot
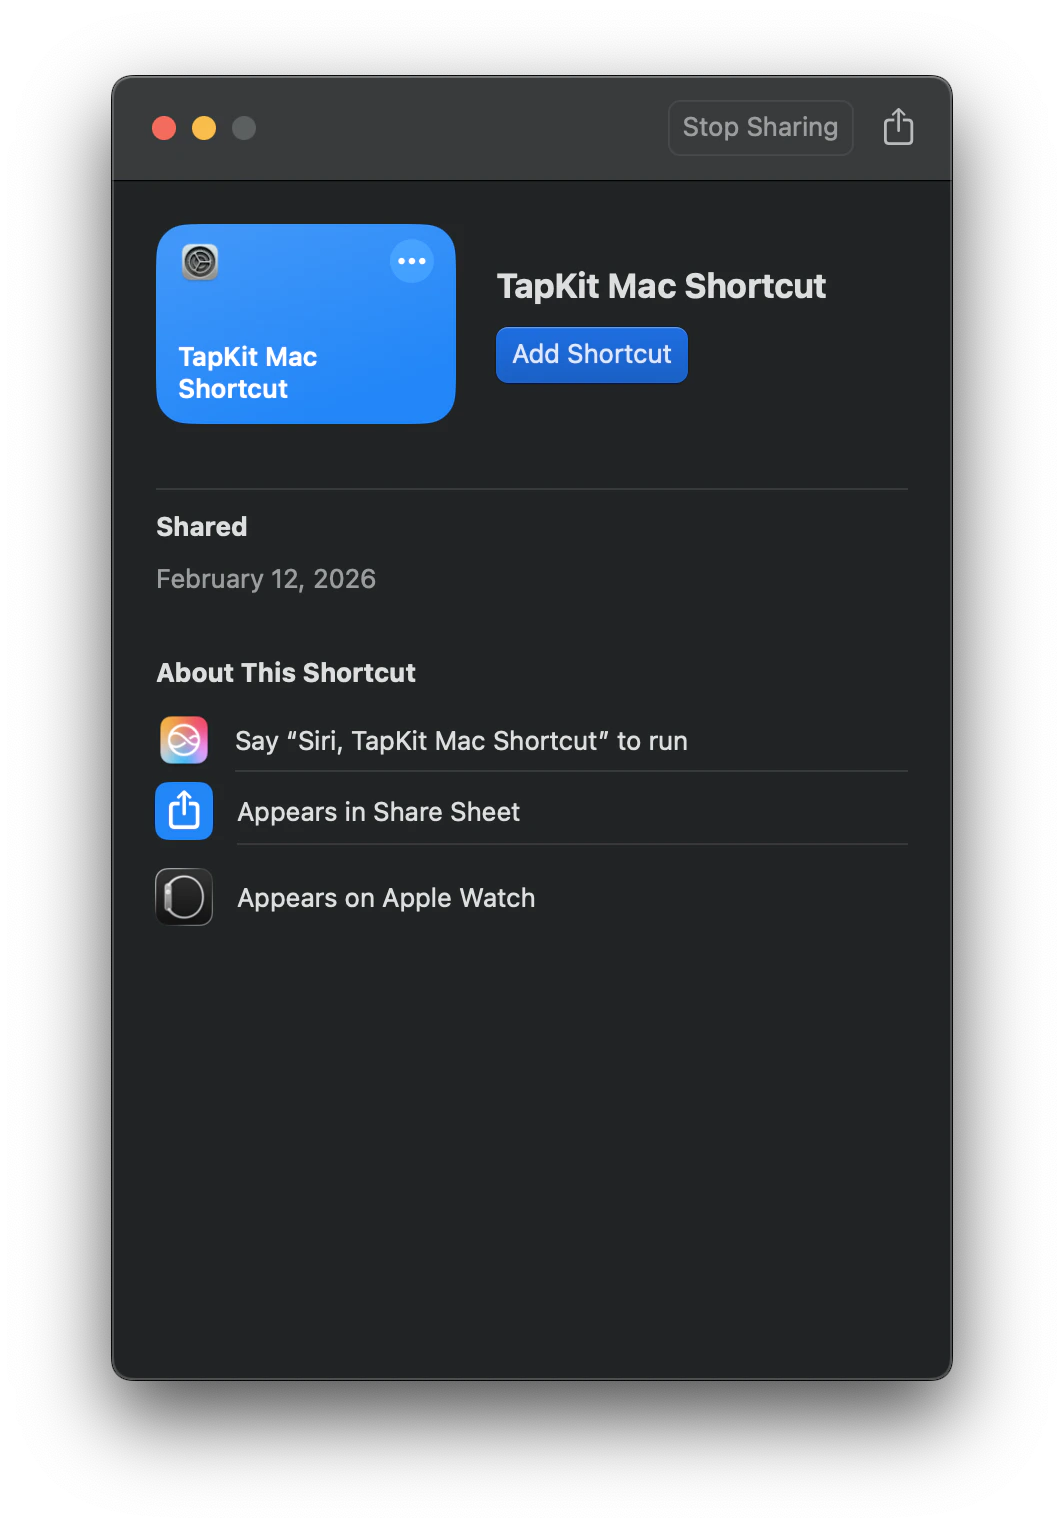
This Shortcut handles clipboard-based data transfer and automation commands. It’s inspectable — you can view the full instruction list in the Shortcuts app anytime.
Pause: Set up your iPhone
The Mac is ready. Now configure your iPhone.Phone Setup
Configure your iPhone for TapKit control — plug in, scan QR codes, enable Switch Control.
Step 6: Pair your Mac to your iPhone
Once phone setup is complete, come back to the Mac app. You should see the “Let’s try TapKit” screen.See screenshot
See screenshot
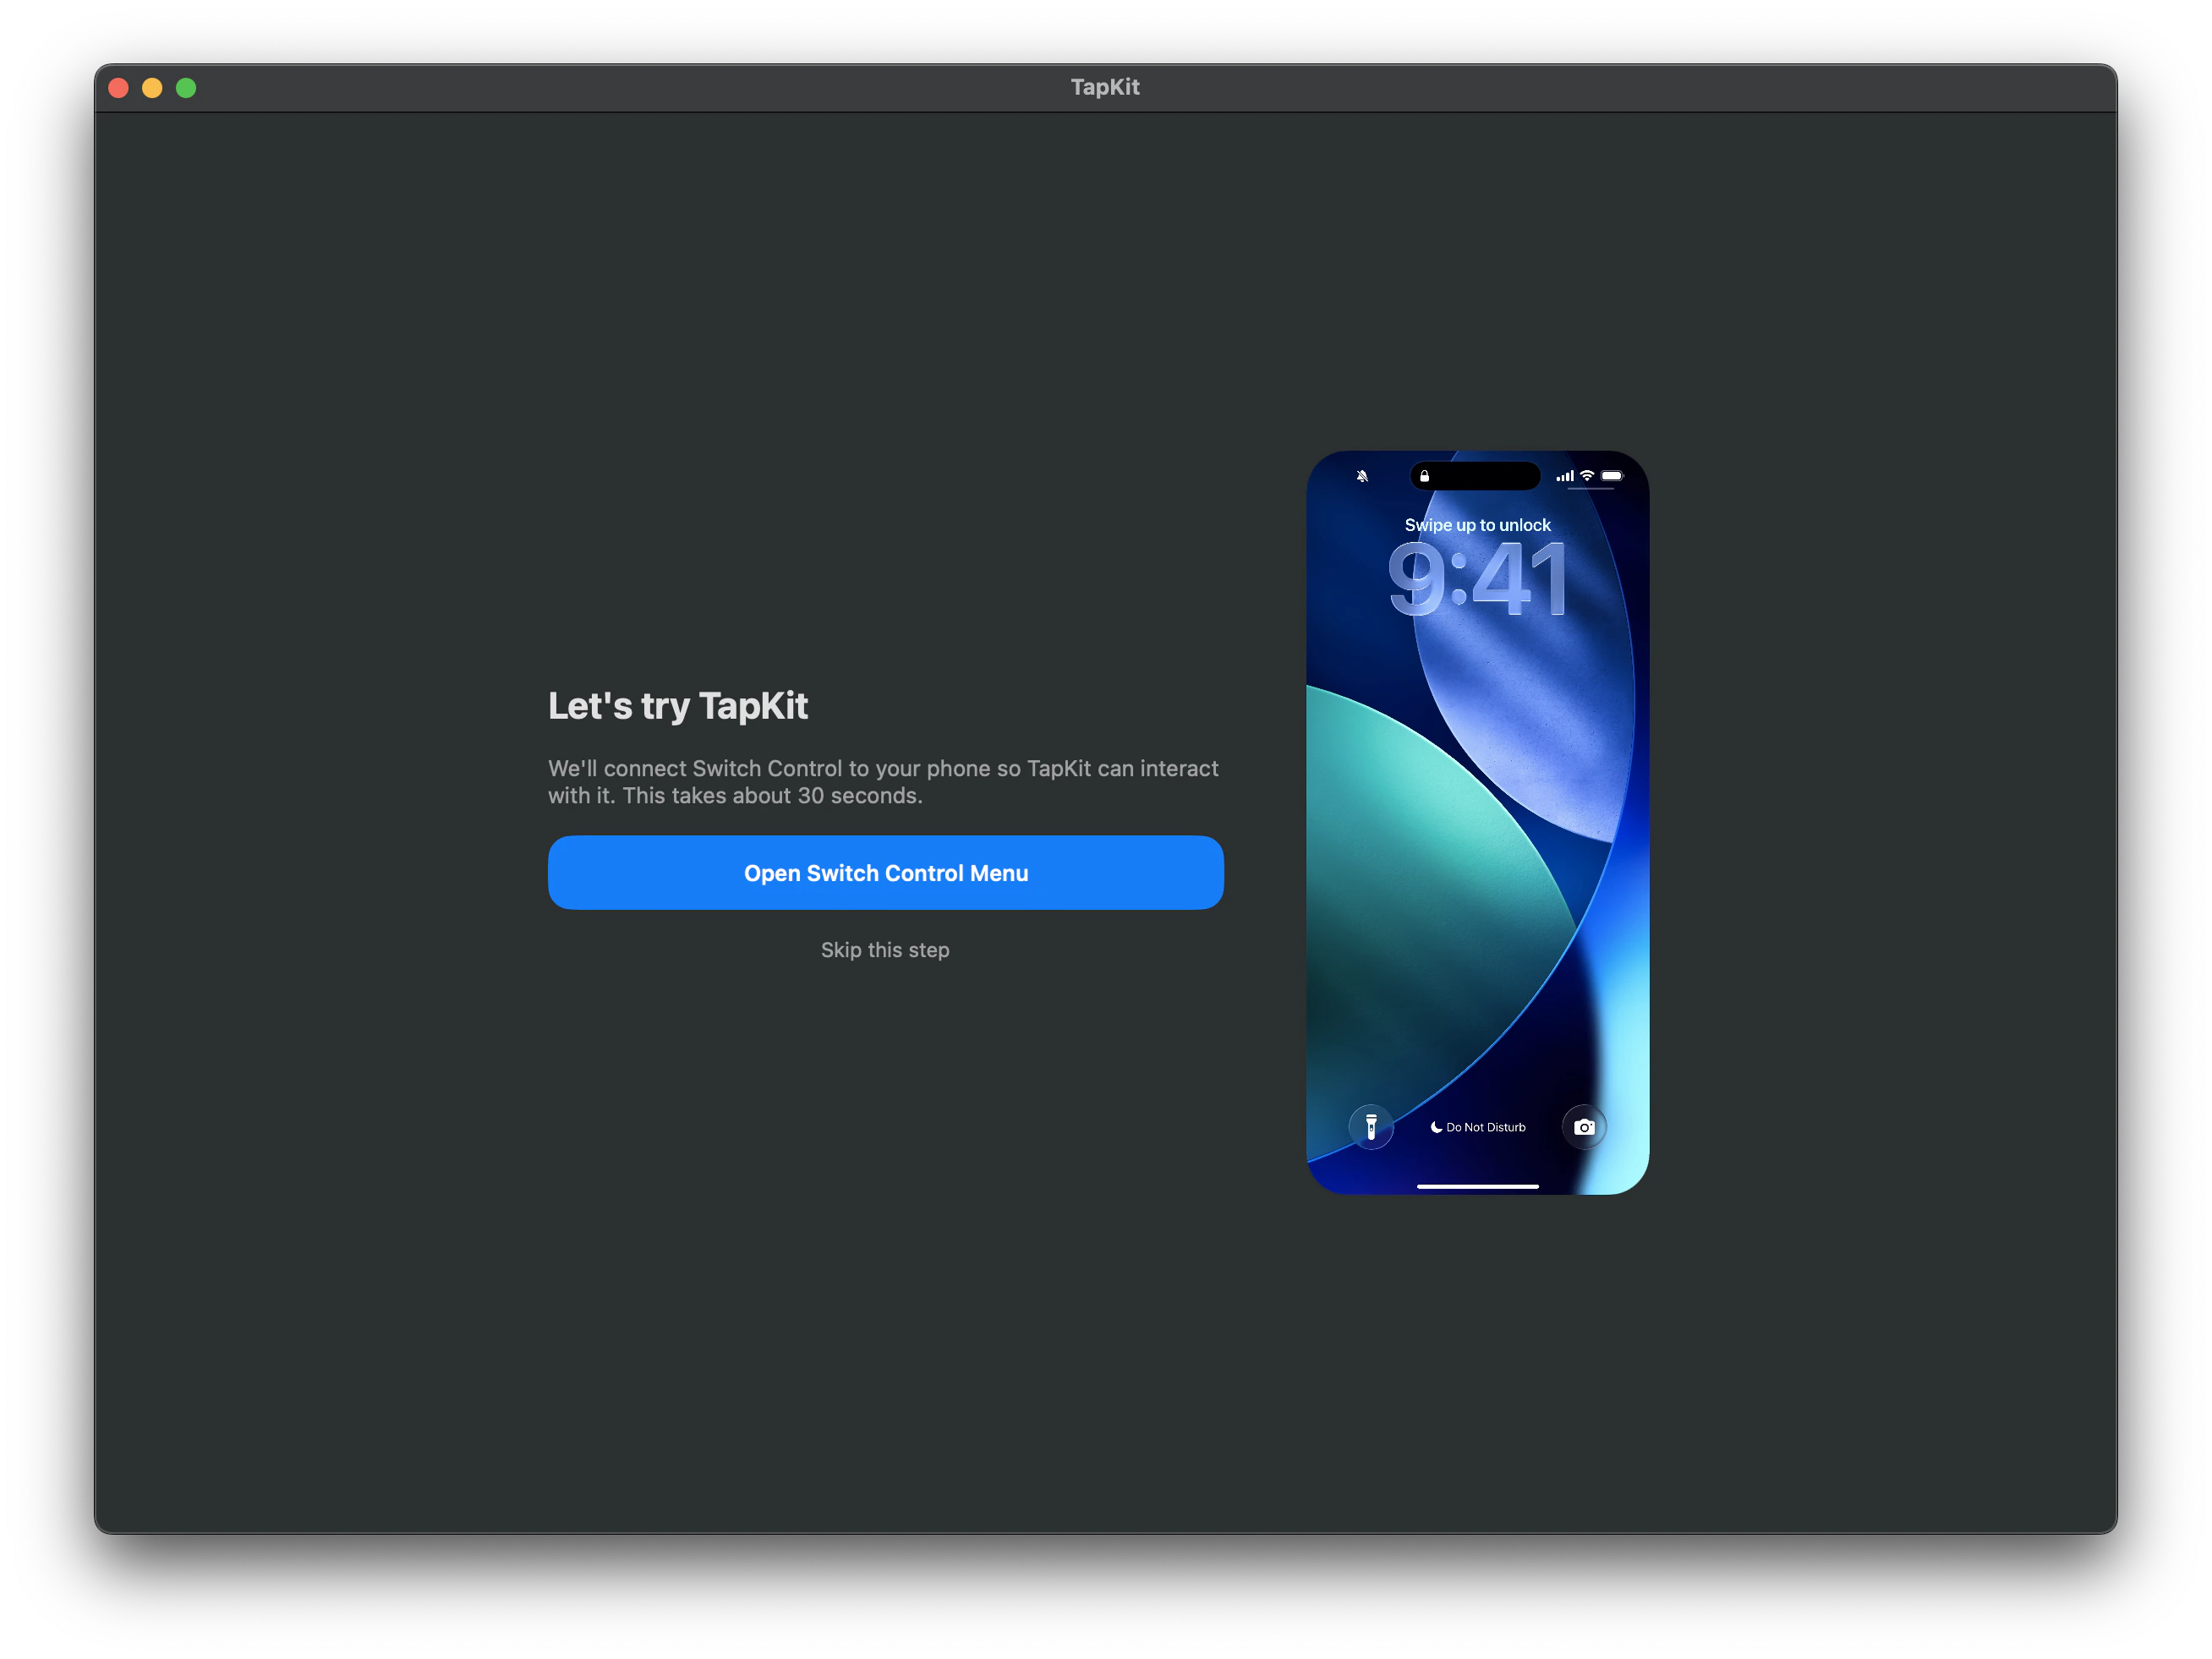
- Click Open Switch Control Menu. A black bar will appear at the top of your screen.
- Click Devices in the Switch Control bar.
- Select your iPhone from the list.
- Click Connect.
See screenshot
See screenshot
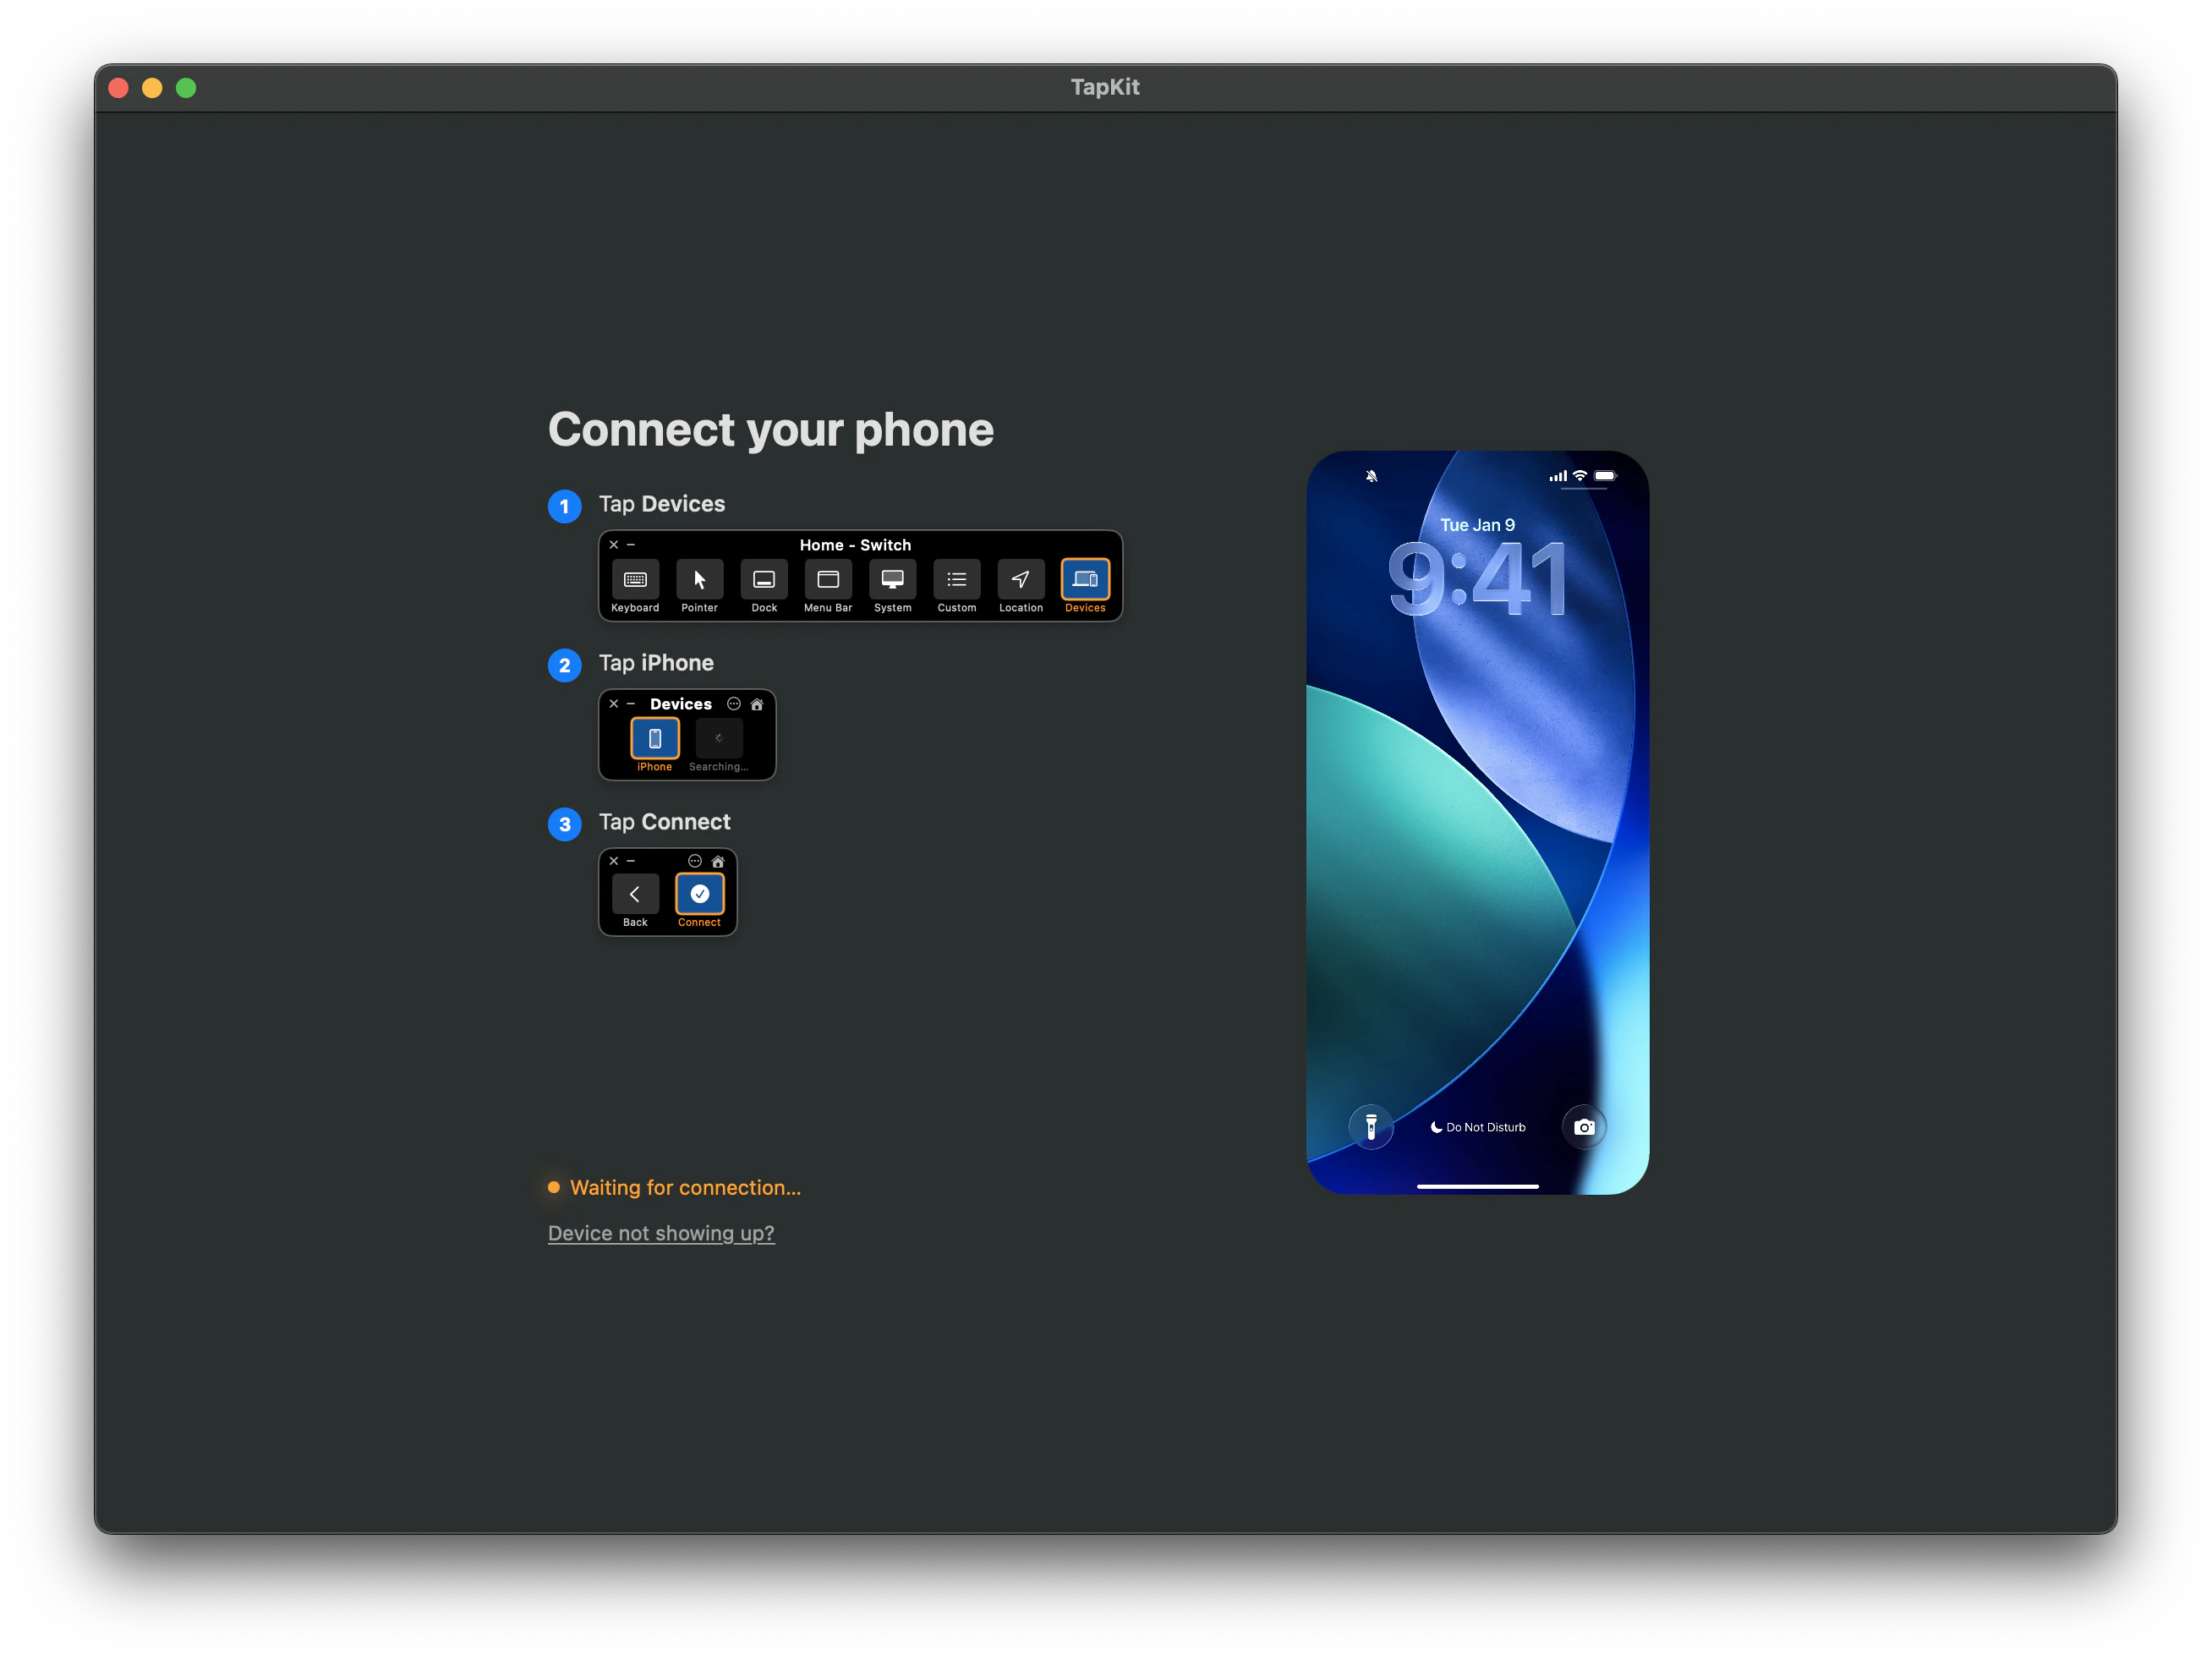
Make sure your iPhone is still plugged in via USB. Wi-Fi, Bluetooth, and iCloud are not required for this step.
Troubleshooting
macOS security warning / app won't open
macOS security warning / app won't open
If macOS says the app is from an unidentified developer, right-click the app and choose Open, then click Open in the dialog. You only need to do this once.
Switch Control config failed
Switch Control config failed
Try restarting the Mac app. If the automatic configuration still fails, contact support@tapkit.ai with your macOS version and any error messages you see.
Shortcut won't install
Shortcut won't install
Make sure you’re running macOS 12 (Monterey) or later. If the Shortcuts app isn’t installed, you can get it from the Mac App Store. Try restarting the Mac app and clicking the install prompt again.
Phone not appearing after connection
Phone not appearing after connection
Verify both devices are on the same Wi-Fi network, Bluetooth is enabled, and both are signed into the same iCloud account. Try unplugging and replugging the USB cable.